Simulation Tools
By using the ProModel Simulation Tools, you are able to simulate the models you create, edit the options for your simulations, and create multiple scenarios to simulate at once.
Single Simulations
To simulate your active drawing created in AutoCAD® and applied ProModel simulation properties to, select the green Simulate icon in the ProModel ribbon. Hover over the Simulate icon, you can see a description of the tool, as well as the command PMSimulate. Typing this into the command box is another way to begin simulating your active drawing.
Once the simulation begins, you see the following options to use.
Info
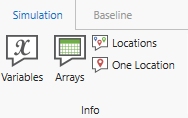
Variables
The Variables icon opens a dialog with information about the Variables in your model. Opening the Variables dialog pauses the simulation until you close the dialog.
The dialog displays the Variables in your model along with each value at that time in the simulation.
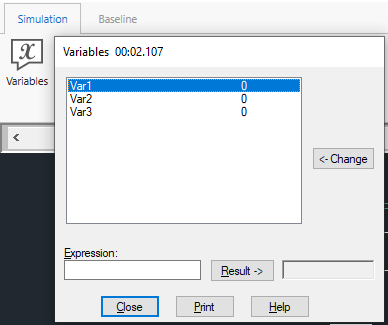
Select a Variable and select Change to manually revise the value.
Use Expression to test expressions involving Variables defined in your model. Type an expression using the Variable names select Result to view the results.
Select Close to close the Variables dialog.
Select Print to print out Variable information.
Locations
The Locations icon opens a dialog with Location information. Opening the Locations dialog pauses the simulation until you close the dialog.
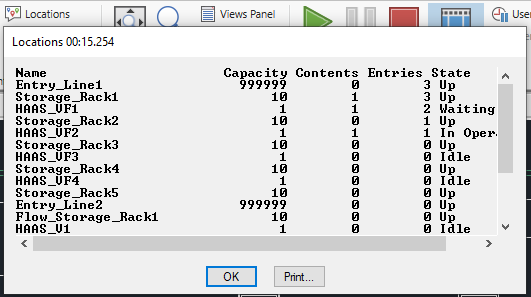
The Locations dialog displays a list of the Locations in your model.
- Name - Location names.
- Capacity - Each Location's capacity.
- Contents - How many Entities are in a particular Location at that moment in the simulation.
- Entries - How many times an Entity has entered a particular Location at that moment in the simulation.
- State - Whether a particular Location is currently In Operation or Idle at that time in the simulation.
Select OK to close the Locations dialog.
Select Print to print out Location information.
One Location
The One Location icon opens a dialog with information about a particular Location as the simulation runs. Opening the One Location dialog pauses the simulation until you close the dialog or until you select a Location from the dialog. To close the One Location dialog without making a selection, select Cancel.
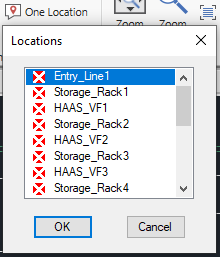
Select a Location in the list and select OK. A new dialog opens and the simulation resumes.
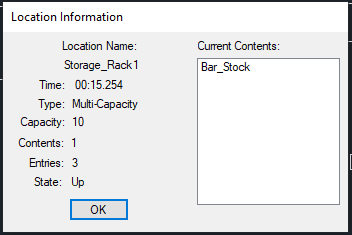
- Location Name - The Location name you are currently viewing.
- Time - The elapsed time in the simulation.
- Type - Whether the Location is Single-Capacity or Multi-Capacity.
- Capacity - The Location capacity.
- Contents - How many Entities are currently in the Location.
- Entries - How many times an Entity has entered the Location.
- State - Whether the Location is currently In Operation or Idle.
- Current Contents - Entities that are currently in the Location you are viewing. The contents of these fields change as the simulation runs to reflect the occurrences in your simulation.
Select OK to close the One Location dialog.
View
The View section tools allow you to change how you display your simulation.

- Zoom to Fit - Fits the simulation to your screen while still keeping all graphics in your simulation in view.
- Zoom - Zoom values from 25% to 400% that you may select to change the simulation size. You may also type a value into Custom Zoom to achieve a more precise zoom.
- View Panel and Views List - See and interact with the views you have defined using the Views tab in the AutoCAD® ribbon.
Simulate

Play, Pause, and Stop
The Play, Pause, and Stop features allow you to halt and continue the simulation at any time, or end the simulation prematurely.
The Stop feature causes the following window to open:
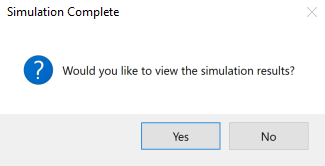
Select Yes to view the simulation results. Select No to end the simulation without viewing the results. For more information on simulation results, see Simulation Results.
Animation
Use Animation to turn off the animation feature for your simulation. This ends the animation and opens the Simulation Results Dialog. Animation differs from Stop in that the simulation continues to run in its entirety without showing the accompanying animation for it.
User Pause Buttons
The User Pause by Time and User Pause by Date buttons allow you to define a time or date in the simulation to halt the simulation.
The User Pause by Time icon opens a dialog to enter the time. Note that the format is hh.mm.xxx. The simulation pauses until this dialog is closed by selecting OK or Cancel.
The User Pause by Date button functions similarly and is enabled for Run Length Types; Weekly Time and Calendar Date.
Trace
The Trace section tools allow you to trace your simulation more closely and view your Logic statements as your simulation progresses.

Step Events - Open a panel to view simulation events and provides a description of each event in the simulation as it occurs. Click to progress to the next event in the simulation. To scroll through several events at once, right-click and hold. As you progress through events in the simulation, the graphics in the simulation animation reflect the progression.
Continuous - View simulation event descriptions in real time as the simulation runs. Right-click and hold to pause the simulation.
Trace Filter - Open a dialog to filter which items appear in a trace while using the Step Events or Continuous options. The Trace Filter dialog is composed of seven folders: Locations, Entities, Resources, Attributes, Variables, Arrays and Subroutines.
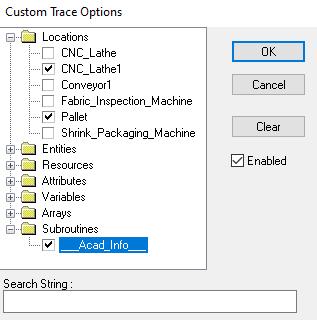
To use the filter:
- Select a folder to see items you have created that correspond to the chosen folder.
- Select items to include in the trace.
- To confirm your selections, select OK.
- To close the Trace Filter dialog without saving your changes, select Cancel.
- To remove all items from your Trace Filter, select Clear.
- To toggle whether or not your Trace Filter is used, select Enable. If the box is checked, then your traces only include the selected items. Otherwise, all model items are included in traces.
Trace to File - Copy trace information into a file while using the Step Events or Continuous option. You can view the file after the simulation. Select Trace to File to toggle this option.
Debug Logic - Open the model debugger and step through the Logic statements in your model.
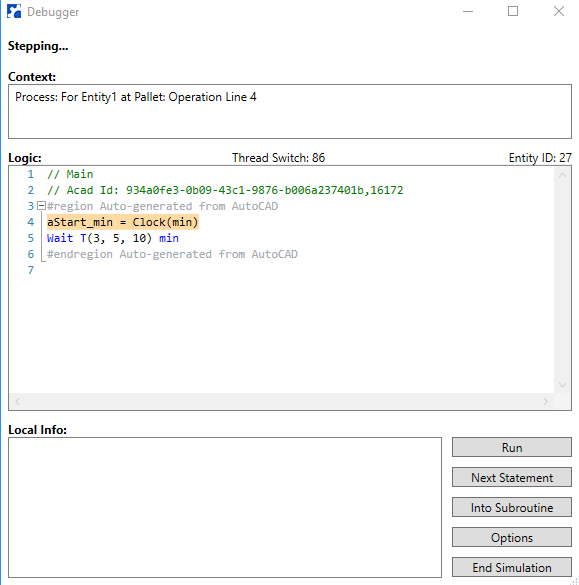
- Use Run to continue the simulation.
- Use Next Statement to step to the next Logic statement in your model.
- Use Options to view further features for debugging your Logic.
- Use End Simulation to stop the simulation.
Simulation Speed
To control the speed of your simulation, use the white bar with a gray rectangle underneath the Simulation ribbon.

Select and hold to drag the gray rectangle and adjust the speed of your simulation. You may also click on the white bar to move the gray rectangle in the direction of your mouse. Moving the rectangle left slows the simulation down and moving the rectangle right speeds the simulation up.
The simulation's elapsed time displays on the speed bar's right side.